


Shopify Analytics Setup: 7 Powerful Steps for Easy Success 2025
Why Proper Analytics Setup is the Foundation of E-commerce Success
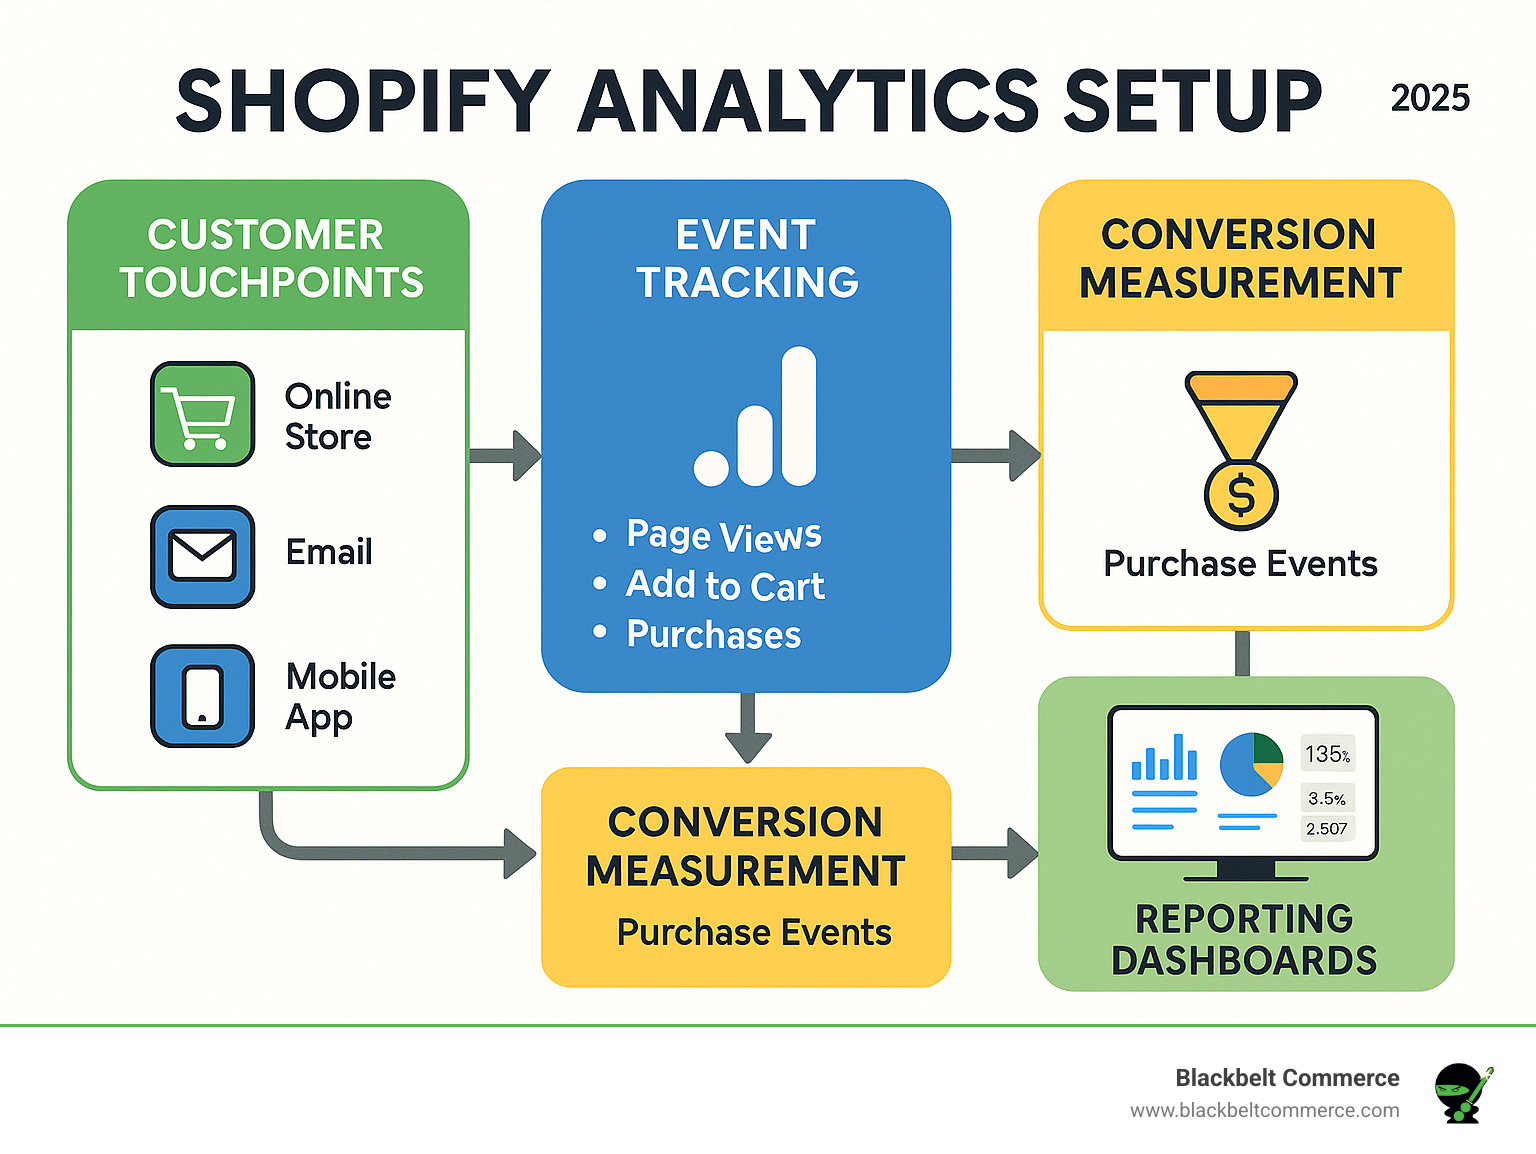
Shopify analytics setup is the backbone of data-driven e-commerce growth, yet many store owners struggle with fragmented data and missed conversion insights. Here’s what you need to know:
Quick Setup Options:
- Google & YouTube App – 5-minute install through Shopify preferences
- Google Tag Manager – Advanced tracking with custom events
- Manual GTAG – Direct theme integration for full control
- Third-party Apps – Automated solutions with improved features
Essential Components:
- Google Analytics 4 property with web data stream
- Shopify Analytics dashboard (built-in)
- Improved ecommerce tracking enabled
- Cross-platform data verification
The stakes have never been higher for accurate tracking. With Universal Analytics retired in July 2023 and the cookieless future approaching, GA4’s event-based model represents the new standard for e-commerce measurement. Unlike session-based tracking, GA4 captures every customer interaction as discrete events, providing cleaner attribution and better privacy compliance.
Shopify’s built-in analytics gives you real-time sales data and visitor insights, but it only tells part of the story. When combined with GA4, you open up customer journey mapping, marketing attribution, and predictive audiences that transform browsers into buyers.
I’m Cesar A Beltran, founder of Blackbelt Commerce, and I’ve guided over 1,000 businesses through successful shopify analytics setup implementations over 15+ years in e-commerce.
Essential shopify analytics setup terms:
What Is Shopify Analytics vs. Google Analytics—And Why You Need Both
Think of your shopify analytics setup like having two different lenses to view your business. One gives you the immediate picture of what’s happening now. The other reveals the deeper story of how customers find and fall in love with your products.
Shopify Analytics is your business’s vital signs monitor. It tracks real-time sales, orders, and visitor activity with lightning speed – updating within about one minute. When you need to know if that flash sale is working or how many people are browsing your store right now, Shopify’s dashboard delivers instant answers.
Google Analytics 4 takes a different approach with its event-based model. Instead of chopping customer interactions into artificial 30-minute sessions, GA4 follows each person’s complete journey using a single user ID. This means you can see exactly how someone found your brand on Instagram, researched on their phone, then purchased on their laptop three days later.
The magic happens when you use both together. Shopify tells you what happened, while GA4 reveals why it happened and how to make it happen more often.
| Feature | Shopify Analytics | Google Analytics 4 |
|---|---|---|
| Data Updates | Real-time (1 minute) | Near real-time |
| Session Definition | 30 minutes or midnight UTC | No session cutoffs |
| Attribution Model | Last-click | Cross-device, multi-touch |
| Customer Journey | Single touchpoint | Complete path |
| Predictive Features | Basic reporting | AI-powered audiences |
| Data Retention | Unlimited | 2-14 months |
Key Insights Shopify Gives You
Shopify’s native analytics shine when you need immediate business intelligence. The sales overview calculates your true revenue by taking gross sales, subtracting discounts and returns, then adding shipping and taxes.
The live visitors feature is like having a window into your store. You can watch today’s sessions unfold in real-time, seeing exactly how many orders and sales are happening as customers browse.
Product performance data reveals your stars and your duds. You’ll quickly spot which items are flying off the virtual shelves and which ones need a marketing boost or price adjustment.
The channel breakdown shows you exactly where your customers are coming from – whether they’re finding you through your online store, social media, or other sales channels.
Key Insights GA4 Adds
Here’s where GA4 becomes your secret weapon. User journeys map out the complete customer experience, showing you the exact path people take from first findy to final purchase. You might find that customers typically visit your site three times before buying, or that they always check your about page before converting.
Marketing attribution solves the age-old question: “Which of my marketing efforts actually work?” GA4’s sophisticated attribution models show you which campaigns, channels, and touchpoints deserve credit for each sale. This scientific research on ecommerce attribution demonstrates how proper attribution can boost marketing ROI by 20-30%.
Cohort analysis reveals customer behavior patterns over time. You can see how customers from different time periods behave, helping you understand seasonal trends and customer lifetime value patterns.
The predictive audiences feature uses AI to identify visitors who are likely to purchase within seven days. This requires at least 1,000 users, but once you hit that threshold, you can create laser-focused retargeting campaigns for your hottest prospects.
GA4’s default data retention is just two months, though you can extend it to 14 months. For businesses with longer sales cycles, this historical data becomes crucial for understanding true customer behavior patterns.
Prerequisites & Choosing Your shopify analytics setup Path
Getting your shopify analytics setup right starts with having the right foundation in place. Think of this as gathering your tools before building something important – you want everything ready so the process goes smoothly.
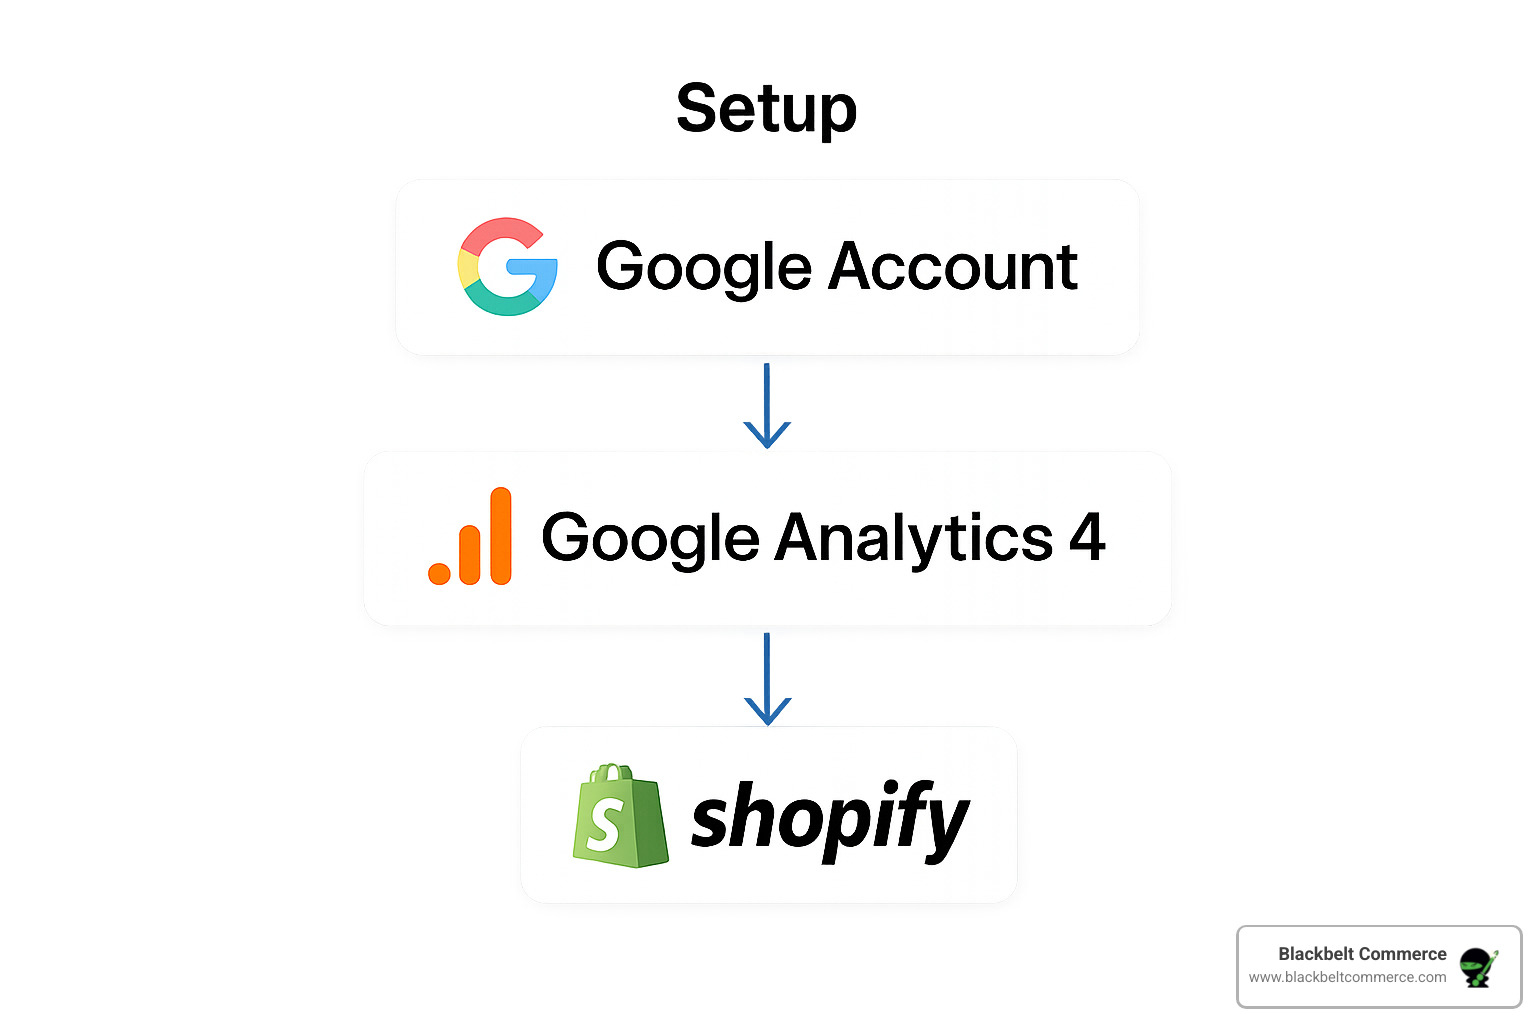
The most important thing you’ll need is a Google account – preferably your business email rather than a personal one. You’ll also need a Google Analytics 4 property with a web data stream configured, which we’ll walk through in detail.
Your Shopify admin access needs to include full permissions for editing preferences and themes. If you’re working with a developer or agency, make sure they have the right access level before starting.
Here’s something many people forget: create a theme backup before making any changes. Even the simplest installations can occasionally cause issues, and having a backup means you can restore your store quickly if something goes wrong.
Privacy is becoming more important every day. Your store’s privacy policy needs to mention analytics tracking, and Shopify’s own privacy policy explains how cookies work on their platform. If you serve customers in Europe, you’ll likely need consent management to comply with GDPR requirements.
Hardware/Software Checklist
You don’t need anything fancy for your shopify analytics setup, but having the right access is crucial. Your Google account should use your business email – this makes account management much cleaner and more professional as your business grows.
Shopify admin access needs to be complete. You’ll be adjusting preferences, potentially editing themes, and installing apps. Limited access accounts often run into permission issues halfway through the setup process.
The theme backup step is non-negotiable. Even experienced developers create backups before making changes. Shopify’s theme editor includes a backup feature, or you can download your theme files directly.
Method Selector: App, GTM, or Manual
Choosing the right installation method can make the difference between a smooth setup and hours of frustration. Each approach has its sweet spot depending on your technical comfort level and what you want to track.
The Google & YouTube app is perfect if you want to get started quickly without touching any code. This official Shopify app handles most of the heavy lifting automatically, including ecommerce event tracking that would take hours to set up manually.
Google Tag Manager becomes the better choice when you need more control over what gets tracked and when. It’s ideal for stores with complex tracking needs, custom events, or multiple marketing tools that need to work together seamlessly.
Manual GTAG injection gives you complete control but requires comfortable theme editing skills. This method works best for developers or store owners with technical backgrounds who want maximum flexibility.
Third-party analytics apps can simplify the entire process with user-friendly interfaces and additional features. The trade-off is usually a monthly fee and less customization than the free Google options.
Step-by-Step: Shopify Analytics Setup with Google & YouTube App
The easiest path to a complete shopify analytics setup is through the official Google & Youtube app. This isn’t just another third-party solution—it’s Google’s own app, which means you get automatic tracking for all the ecommerce events that matter most to your business.
What makes this approach so powerful is how it handles the technical heavy lifting for you. Once installed, the app automatically fires page view, search, view item, add to cart, begin checkout, add payment information, and purchase events. These are exactly the data points you need to understand your customer journey and optimize for conversions.
shopify analytics setup: Quick Version (5-Minute Install)
If you’re comfortable with technology and just want to get tracking up fast, here’s the express route. Install the Google & YouTube app from the Shopify App Store—it’s the one with Google’s official verification badge.
Connect your Google account when prompted, making sure to use the same account that has access to your Analytics property. The app will then show you a dropdown to select your GA4 property. If you don’t see your property listed, double-check that you’re signed into the right Google account.
Enable improved ecommerce settings in the app’s configuration panel. This is crucial because it’s what sends your sales data to Analytics. Finally, test your setup by visiting your store in a new browser window and checking GA4’s DebugView to confirm events are flowing through.
shopify analytics setup: Full Walk-Through With Screenshots
Let me walk you through each step with the detail you need to get this right the first time. This process typically takes 15-20 minutes when done thoroughly.
Creating your GA4 property comes first if you haven’t done this yet. Head to Google Analytics and click the Admin gear icon in the bottom left. Select Create Property and make sure you choose the GA4 option (not Universal Analytics, which is now retired). Enter your store name and website URL exactly as they appear in your Shopify settings.
Setting up your web data stream is your next move. Inside your new GA4 property, steer to Data Streams under the Admin section. Click Add Stream and choose Web as your platform. Enter your Shopify store’s full URL, including the https:// part. Google will generate a Measurement ID that starts with “G-“—write this down because you might need it later.
Installing the Google & YouTube app requires going to your Shopify admin panel. Click Apps in the left sidebar, then App Store. Search for “Google & YouTube” and look for the app with the official Google verification. Click Install and grant the necessary permissions when Shopify asks.
Configuring your analytics connection happens inside the newly installed app. You’ll see a Connect Google Account button—click it and sign in with the account that owns your GA4 property. The app should automatically detect your Analytics property, but if you have multiple properties, make sure you select the right one from the dropdown menu.
Enabling improved ecommerce is where the magic happens for sales tracking. Look for the Improved Ecommerce or Improved Ecommerce toggle in the app settings and turn it on. This tells the app to send detailed purchase information to Analytics, including product names, quantities, and revenue amounts.
Verifying everything works requires a bit of detective work, but it’s worth doing properly. Open GA4 and go to Configure > DebugView. In a separate browser window (or incognito mode), visit your store and add a product to cart. You should see events appearing in DebugView within seconds. If you’re feeling brave, complete a small test purchase to verify that purchase events are tracking correctly.
The beauty of this method is that once it’s set up, it just works. The app automatically updates when Google releases new tracking features, and you don’t need to worry about theme updates breaking your analytics code.
Advanced Installations: GTM & Manual GTAG for Power Users
When you need complete control over your tracking or want to set up complex custom events, the Google & YouTube app might feel limiting. That’s where Google Tag Manager and manual GTAG installation come in – they’re the power tools for serious shopify analytics setup implementations.
Think of GTM as your analytics command center. Instead of hardcoding tracking scripts into your theme, you manage everything from one dashboard. This approach becomes invaluable when you’re running multiple marketing tools, A/B testing platforms, or need granular event tracking that goes beyond standard ecommerce events.
Manual GTAG injection gives you the ultimate flexibility but requires comfort with theme editing. It’s perfect when you want lightweight tracking without the overhead of a tag management system, or when you need to implement very specific tracking requirements that other methods can’t handle.
Setting Up GA4 via Google Tag Manager
Getting started with GTM feels overwhelming at first, but once you understand the container-tag-trigger relationship, it becomes your best friend for managing analytics across your store.
Creating your GTM foundation starts at tagmanager.google.com where you’ll set up a new account and container. Your container acts like a virtual filing cabinet for all your tracking codes. When you create it, Google gives you a container ID that looks like GTM-XXXXXXX – this becomes your gateway to managing all tracking from one place.
Installing GTM on your Shopify store requires two small code snippets. The first goes in your theme.liquid file right before the closing </head> tag, and the second goes immediately after the opening <body> tag. Don’t worry – these snippets are tiny and won’t slow down your site. Just remember to backup your theme first!
Configuring GA4 within GTM is where the magic happens. You’ll create a GA4 Configuration tag using your measurement ID, then set it to trigger on all pages. Here’s a crucial tip from our experience: disable the automatic page_view events in your GA4 tag settings to prevent duplicate page views from firing.
Setting up ecommerce tracking through GTM requires understanding Shopify’s data layer. Your purchase events, add-to-cart actions, and other ecommerce interactions need proper variable mapping to flow correctly into GA4. The debug view becomes your best friend here – it shows you exactly which events are firing and what data they’re carrying.
Injecting GTAG Manually Into Your Theme
Sometimes you want to skip the middleman entirely. Manual GTAG installation puts your tracking code directly into your theme, giving you complete control over when and how events fire.
Accessing your theme editor is straightforward – just steer to Online Store → Themes → Edit Code in your Shopify admin. Before you touch anything, create a theme backup. I can’t stress this enough. We’ve seen too many store owners panic when a small code change breaks their site.
Adding the global site tag involves pasting Google’s tracking snippet into your theme.liquid file before the closing </head> tag. The code includes your GA4 measurement ID and handles the basic page view tracking automatically. Make sure you’re using the async version of the snippet for better site performance.
Configuring ecommerce tracking manually means adding purchase tracking code to your order status page and cart interaction events throughout your theme. This approach requires more technical knowledge but gives you precise control over what data gets sent and when.
Testing your implementation becomes critical with manual installations. Use your browser’s developer tools to verify events are firing correctly, and always complete test purchases to ensure your conversion tracking works perfectly. The extra effort pays off with cleaner, more reliable tracking that does exactly what you need.
Making Sure It Works: Verification, Reporting & Optimization
Proper verification ensures your shopify analytics setup captures accurate data for business decisions.
Verification Checklist:
- Real-time reports show current visitors
- GA4 DebugView displays firing events
- Test purchases appear in ecommerce reports
- Revenue numbers align between Shopify and GA4 (within 10% variance is normal)
Must-Monitor Metrics & Reports
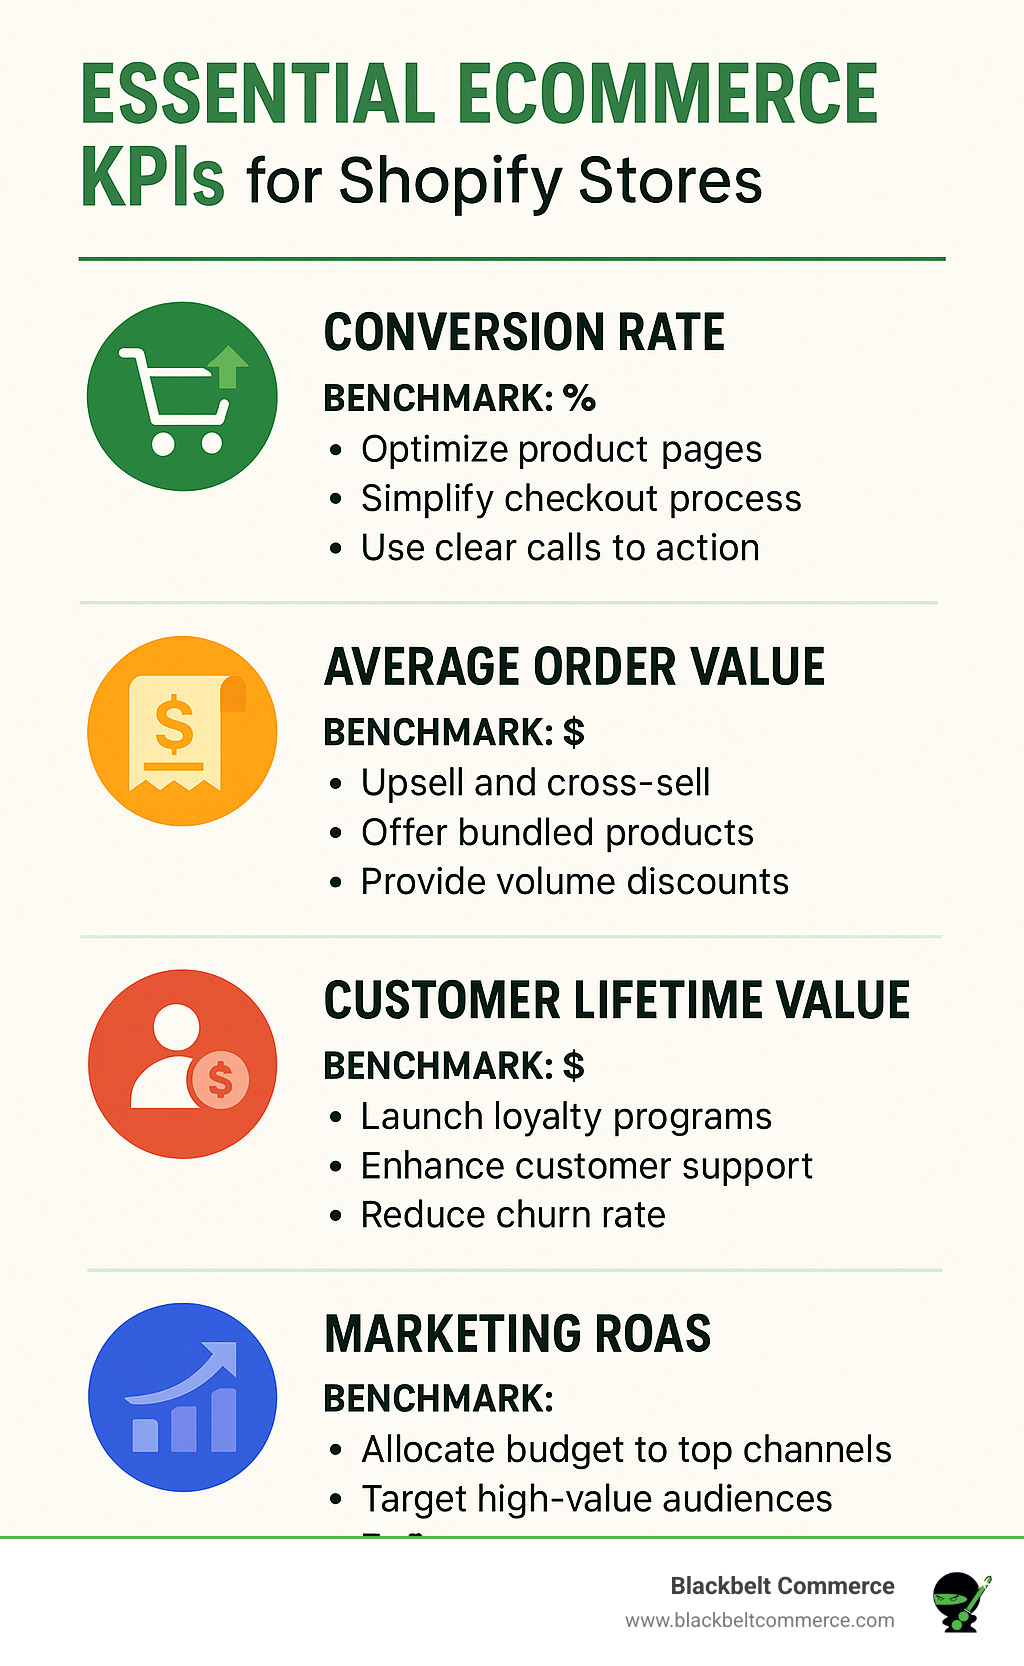
Focus on these key performance indicators:
- Conversion Rate: Total orders divided by total sessions
- Average Order Value: Total revenue divided by number of orders
- Customer Lifetime Value: Predicted revenue per customer over time
- Marketing ROAS: Revenue attributed to specific campaigns
- Funnel Exploration: Where customers drop off in the purchase process
Turning Data Into Revenue
Transform your analytics data into actionable growth strategies:
Segmentation Strategies:
- Create audiences based on purchase behavior
- Target high-value customers with premium products
- Re-engage cart abandoners with personalized offers
Product Optimization:
- Identify top-performing products for inventory decisions
- Analyze page performance to improve product descriptions
- Use internal search data to find new product opportunities
Marketing Attribution:
- Allocate budget to highest-performing channels
- Optimize campaigns based on true revenue attribution
- Build custom audiences for Google Ads remarketing
Research shows that internal search users convert up to 87% higher than average visitors, making search term analysis crucial for product development and marketing strategies.
Frequently Asked Questions about Shopify Analytics
After helping thousands of merchants with their shopify analytics setup, I’ve noticed the same three questions come up repeatedly. Let me clear up these common concerns so you can focus on growing your business instead of worrying about data discrepancies.
Why don’t my Shopify and GA4 numbers match?
Don’t panic when you see different numbers between Shopify Analytics and Google Analytics 4 – this is completely normal and expected. I’ve had countless clients call me worried that their tracking was broken, but data discrepancies are actually a sign that both systems are working correctly.
Here’s what’s happening behind the scenes: Shopify counts sessions differently than GA4. Shopify ends a session after 30 minutes of inactivity or at midnight UTC, while GA4 uses its own session timeout rules. It’s like two people timing the same race with different stopwatches – they’ll get slightly different results.
Bot filtering also creates variations. GA4 is more aggressive at filtering out bot traffic than Shopify, which means GA4 often shows lower visitor counts. This is actually good news – you’re getting cleaner, more accurate human visitor data.
The attribution models each platform uses add another layer of difference. When a customer clicks three different ads before buying, Shopify and GA4 might credit different touchpoints for that sale.
Data processing speed varies too. Shopify processes most data within minutes, while GA4 can take several hours to fully process complex ecommerce events. This timing difference is especially noticeable during high-traffic periods.
Expect variations of 5-15% between platforms – anything in this range is perfectly normal. Focus on tracking trends and patterns rather than obsessing over exact numbers. If you see a 50% difference, then it’s time to investigate your setup.
Do I need consent banners for analytics cookies?
The short answer is yes, if you serve customers in regions with strict privacy laws. Even though GA4’s event-based model is more privacy-friendly than the old Universal Analytics, you still need to respect your customers’ privacy choices.
European customers require clear consent under GDPR regulations. This means implementing a cookie consent banner that lets visitors choose whether to accept analytics tracking. The good news is that modern consent management tools make this process seamless for both you and your customers.
Your privacy policy needs updating to clearly explain what data you collect and how you use it. Don’t copy someone else’s policy – make sure it accurately reflects your specific tracking setup and business practices.
CCPA compliance for California customers requires providing an opt-out mechanism. Many businesses use the same consent banner system to handle both GDPR and CCPA requirements, which simplifies management.
The key is being transparent and giving customers control. Most visitors who understand the value of personalized shopping experiences will consent to analytics tracking when you explain the benefits clearly.
What happens to my tracking when I change themes?
Theme changes can absolutely break your analytics tracking, but the impact depends on how you implemented your shopify analytics setup originally. I always tell clients to plan their tracking method with future theme changes in mind.
App-based tracking through the Google & YouTube app usually survives theme changes beautifully. The app integrates at the platform level rather than the theme level, so your tracking continues working seamlessly when you switch themes.
Manual GTAG installations are the most vulnerable to theme changes. Since you’ve added the tracking code directly to your theme files, switching themes means you’ll need to re-implement the entire tracking setup. Always backup your tracking code before changing themes.
Google Tag Manager tracking falls somewhere in between. You’ll need to re-add the GTM container code to your new theme, but all your tags, triggers, and variables remain intact in your GTM account. It’s like moving houses – you need to reconnect the utilities, but all your furniture stays the same.
My recommendation is to always test your tracking after any theme change, regardless of your setup method. Complete a test purchase, check that events fire in GA4 DebugView, and verify that your conversion tracking still works properly. Better to catch issues immediately than lose weeks of valuable data.
Conclusion
Getting your shopify analytics setup right isn’t just about installing a tracking code—it’s about building the foundation for every smart business decision you’ll make moving forward. Think of it as your store’s nervous system, collecting signals from every customer interaction and turning them into actionable insights.
The beauty of modern analytics lies in having options that match your comfort level. Whether you’re just starting out with the Google & YouTube app’s five-minute setup or diving deep with custom GTM configurations, the most important step is simply getting started. Perfect tracking beats no tracking every single time.
Here’s what I’ve learned after helping over 1,000 Shopify stores transform their analytics game: the stores that grow fastest aren’t necessarily the ones with the most complex tracking setups. They’re the ones that consistently act on their data, test new approaches, and optimize based on what their customers actually do.
Your analytics journey doesn’t end with installation. The real magic happens when you start connecting the dots between customer behavior and business results. That abandoned cart report becomes a targeted email campaign. Those product performance insights guide your inventory decisions. The customer journey data reveals exactly where to focus your conversion optimization efforts.
At Blackbelt Commerce, we’ve seen this change happen countless times. Store owners who felt overwhelmed by data suddenly become confident decision-makers when they have the right tracking foundation in place. Our team specializes in making complex analytics feel simple, handling everything from initial setup to advanced conversion tracking strategies.
The e-commerce landscape keeps evolving, but one thing remains constant: data-driven stores consistently outperform their gut-feeling competitors. With GA4’s privacy-first approach and Shopify’s real-time insights working together, you’re not just tracking sales—you’re building a complete picture of your customer relationships.
Ready to stop guessing and start growing? Our analytics experts handle the technical complexity while you focus on what you do best—running your business. We’ll ensure your tracking captures every crucial customer interaction and turns those insights into revenue growth.
More info about Shopify SEO services to complement your analytics strategy and drive organic growth.
Contact us today for a free analytics audit and find how proper tracking can open up your store’s growth potential. Because when you know exactly how your customers behave, growing your business becomes a whole lot easier.
Quick Answer: shopify analytics setup
Shopify analytics tools help merchants understand what is driving traffic, conversion, average order value, repeat purchases, and customer drop-off. The right analytics stack should connect data to action, so store owners can prioritize improvements instead of collecting reports that never change the business.
Want a sharper Shopify growth plan?
If this article connects to a current store decision, use the calendar to book a strategy call and turn the idea into a practical plan.
Key Takeaways
- shopify analytics setup should answer the reader’s immediate question and then connect the advice to a practical Shopify business decision.
- The article should feel specific, useful, and worth sharing rather than like a generic SEO insert.
- Internal links should reinforce the home page, Shopify experts, Shopify Plus agencies, and the most relevant service pages.
- The commercial bridge should connect the topic to the Shopify Growth, CRO, and Store Optimization cluster without interrupting the educational flow.
- The same-page Calendly CTA should let qualified readers book a strategy call without leaving the article.
How this connects to your Shopify growth strategy
This article should remain useful for readers researching shopify analytics setup, but it also needs to show when the topic becomes a business decision. For the Shopify Growth, CRO, and Store Optimization cluster, the commercial bridge is practical: once the reader understands the concept, the next step is deciding whether their current Shopify setup can support the desired experience, conversion path, and operational workflow. That is where expert planning, design, development, CRO, and SEO support can turn the idea into measurable store improvements.
Want a sharper Shopify growth plan?
Use this guide as a decision tool. Then book a strategy call when you want a practical roadmap for your store.
Related Shopify resources
These internal resources support the Shopify Growth, CRO, and Store Optimization topic cluster and help connect this guide to stronger commercial next steps:
- Shopify CRO
- Shopify experts
- Shopify Plus agencies
- Shopify CRO — Parent service page for the reader’s next commercial step
- Blackbelt Commerce — Home-page authority link for brand and core Shopify expertise
- Shopify experts — Money-page link requested for expert-hiring intent
- Shopify Plus agencies — Money-page link requested for high-growth and Plus-agency intent
- Shopify custom development — Development service page for implementation and technical help
- Shopify checkout optimization — Related conversion article
- Shopify conversion optimization — Related CRO article
Questions store owners ask before taking action
Why does shopify analytics setup matter for Shopify merchants?
shopify analytics setup matters when it affects customer trust, store performance, conversion, operations, or the ability to grow without avoidable rework.
What should the reader do first?
They should identify the business goal, review the current customer journey, and decide which improvement would have the clearest impact.
How do internal links help this article?
Internal links connect the educational topic to related service pages, Shopify experts, Shopify Plus agency support, and deeper resources.
When is expert help useful?
Expert help is useful when the decision affects revenue, SEO, conversion, integrations, technical implementation, or a high-risk store change.
How does this article support lead generation?
It educates first, then gives qualified readers a same-page option to book a strategy call when they need help applying the advice.
Future articles needed for topical dominance
To build deeper topical authority around this cluster, these supporting topics should be created later and linked back into this article:
- Shopify Analytics Setup Checklist for Shopify Store Owners: Creates a practical support article that turns the Shopify Growth, CRO, and Store Optimization topic into an actionable review tool.
- Common Shopify Analytics Setup Mistakes and How to Avoid Them: Captures problem-aware searches and gives BBC a natural place to explain implementation risks without hard selling.
- When to Hire Shopify Experts for Shopify Analytics Setup: Connects informational demand to the expert-hiring money page while preserving educational intent.
Want a sharper Shopify growth plan?
Ready to turn the advice in this article into an action plan? Open the calendar here and choose a time that works for you.
